Data Loader In Salesforce -: Salesforce is using a tool for managing data called the data loader. Data Loader is a client application for the bulk import or export of data. It Used to insert, update, delete, or export Salesforce records. When importing data, Data Loader reads, extracts and loads data from comma-separated values (CSV) files or from a database connection.
Data Loader Data Types –: We know that Data types define the type of data a variable that can store the value of data. An example an integer variable store integer data and a character type variable store character data. Like data loader supported various data type as like standard integer string, double, all type string etc. Integer -: Data loader support standard integer string
String-: All XML valid string supported.
Double -: Data loader support standard double string data type.
Base 64-: String path to file (converts the file to a base 64 encoded array). Base 64 fields are only used to insert or update attachments and Salesforce CRM Content.
Date Format data type- : Data loader support all date format as like “yyyy-mm-dd hh:mm:ss” .
Boolean data type-: It is supported boolean data type true value insensitive (yes,true,on,1) and false value (no,false, off, 0).
Export Files Using Data Loader in Salesforce
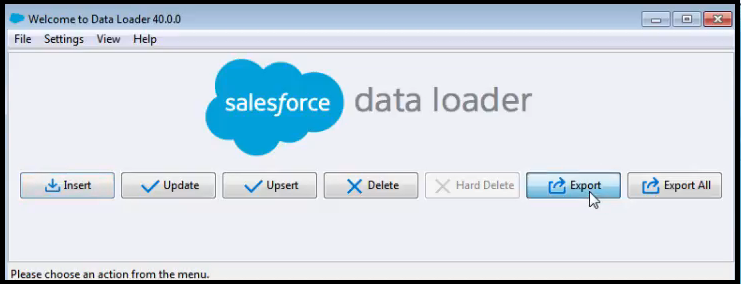
Exporting files in Salesforce crm open the Salesforce account. First Install data loader. Now open Data Loader and click the export button here as like

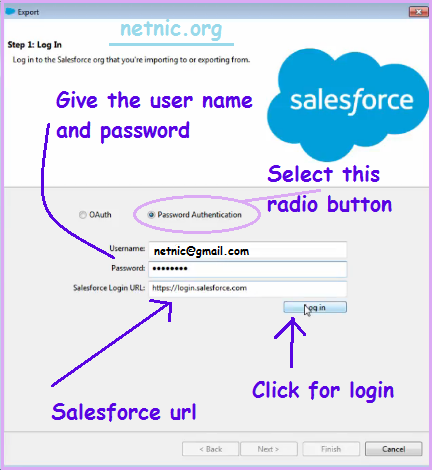
If you want to also export archived activity records and soft-deleted records, click Export All instead. Otherwise click the Export Button here for uploading the file. Now a new window will open here that asked the username and password here as like

When we click export button this type popup box will open here. Here we select the Radio button Password Authentication. It’s asked the username and password. Give the Salesforce username and password. It’s takes the Salesforce login url by default now click the login button.
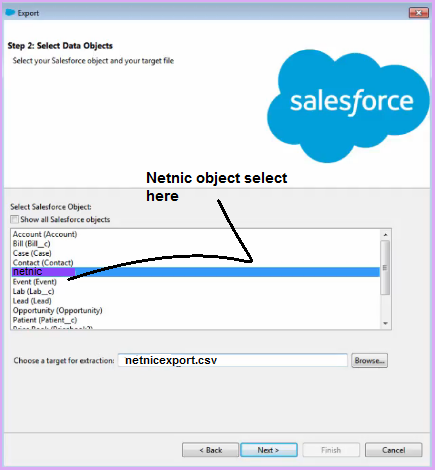
After Login click the next button on this popup box. Now another box will open here. Here we select the object where we want to show our data. We have created a Object in Salesforce netnic. Here we select netnic object as like here

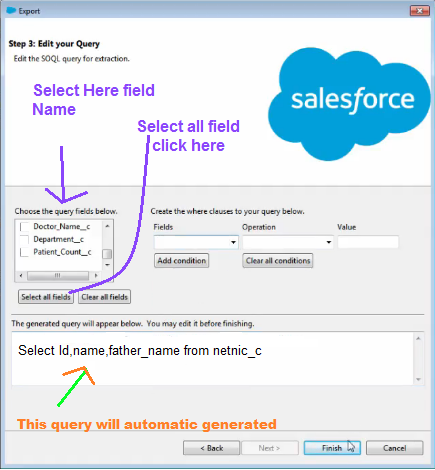
Here we select a target of extraction using the browser button here where you want to save this file give the address here. Now click the next button here. Now a another box will open here where we select the field name as like id, name , father_name etc.

In this Window we can give the specific condition selecting add condition for specific condition now click the finish button. It’s give the popup box “You have choose to perform an export” click the yes button. Now its show the record which you have select the perform.
You can check here all export data in netnicexport.csv file. You can open this file and check it. we can can export file using data loader in Salesforce and get the data .