- To create a bootable USB drive manually, we’ll use the prompt as a Windows default program. Here are step through step to create a bootable USB power as the Windows installation media. To create a bootable USB force as a Windows set up media, we require at least 4 GB for minimum capacity. Larger capacity is better. At this moment, we use the USB flash force with 2 GB of potential as just an example. It’s due to some motives that my 4 GB flash power encountered an uncommon trouble that we have to restoration later.
Step 1:
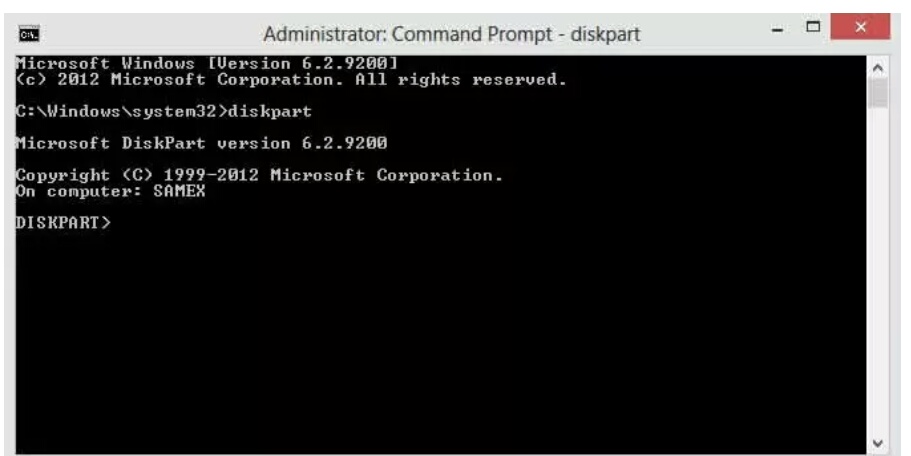
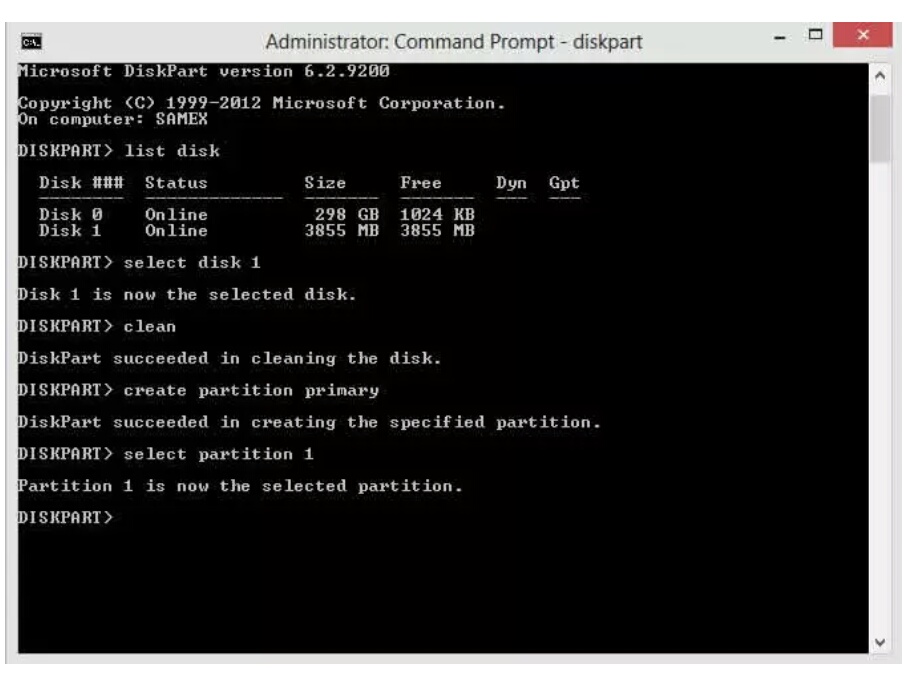
1. Insert our USB flash pressure to our walking computer. As the start, we need to run Command Prompt as administrator. To do this, we want to locate cmd by means of typing ‘cmd’ in the search field on Windows Start Menu. After search end result for ‘cmd’ appears, proper click on on it and select “Run as administrator”.
2. Type ‘diskpart’ on Command Prompt without quotes and hit Enter. Wait for a while until the DISKPART software run.
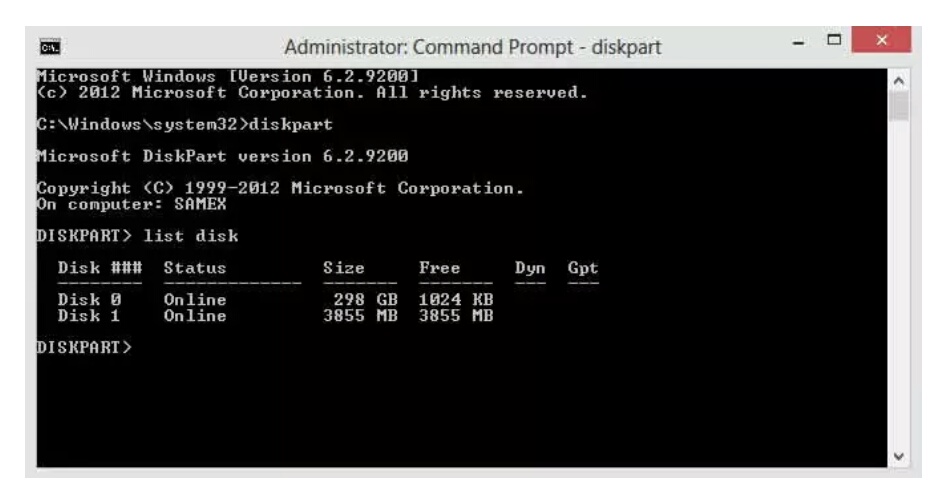
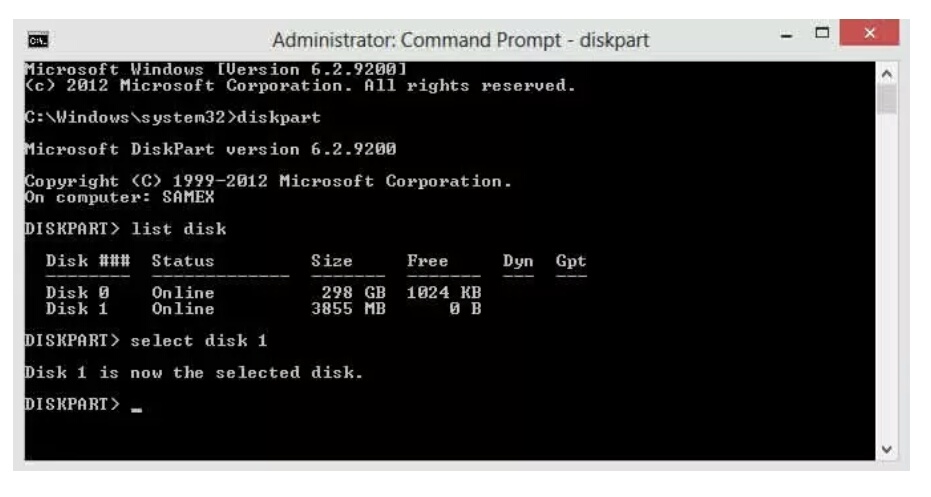
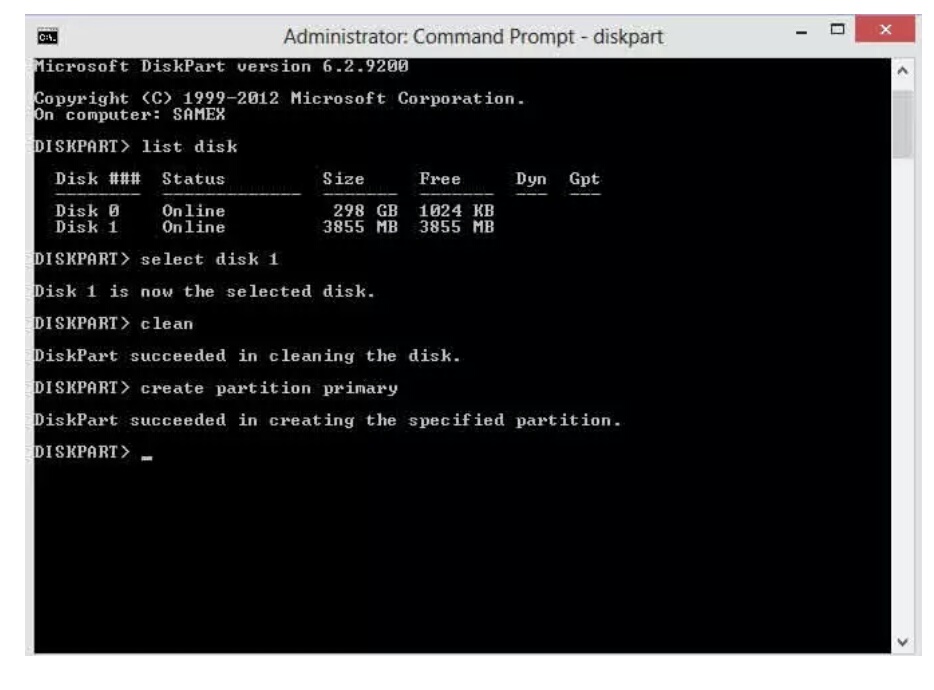
3. Type ‘list disk’ to view energetic disks on our computer and hit Enter. There would be considered that the active disks shown as Disk 0 for hard pressure and Disk 1 for our USB flashdrive with its whole capacity.
4. Type ‘select disk 1’ to determine that disk 1 would be processed in the next step then hit Enter.
5. Type ‘clean’ and hit Enter to take away all of data in the drive.

6. Type ‘create partition primary’ and hit Enter. Creating a main partition and further recognized by Windows as ‘partition 1’.
7. Type ‘select partition 1’ an hit Enter. Choosing the ‘partition 1’ for placing up it as an energetic partition.
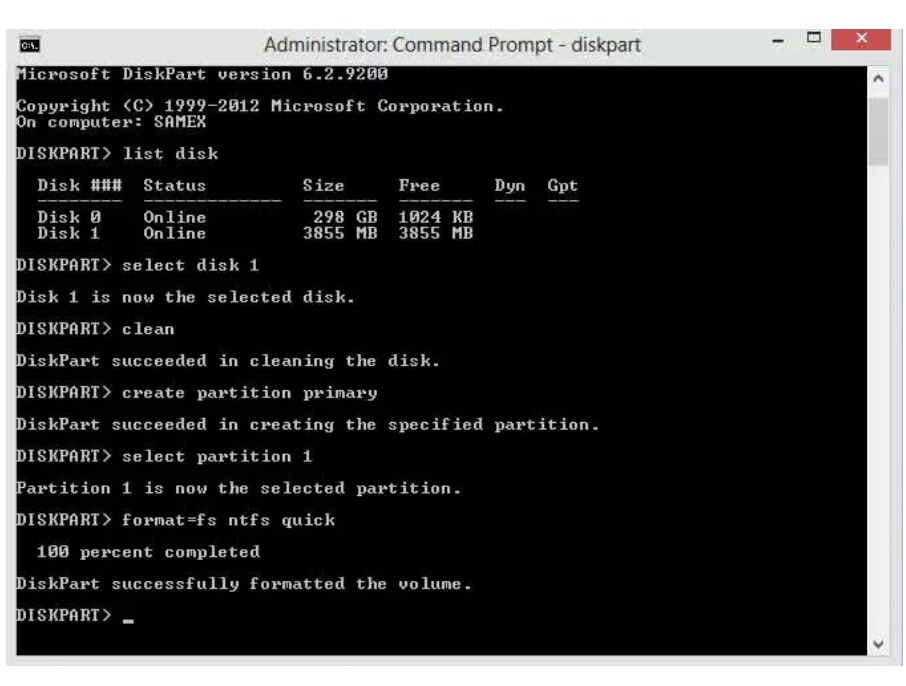
8. Type ‘format fs=ntfs quick’ and hit Enter. Formatting cutting-edge partition as NTFS file system quickly.
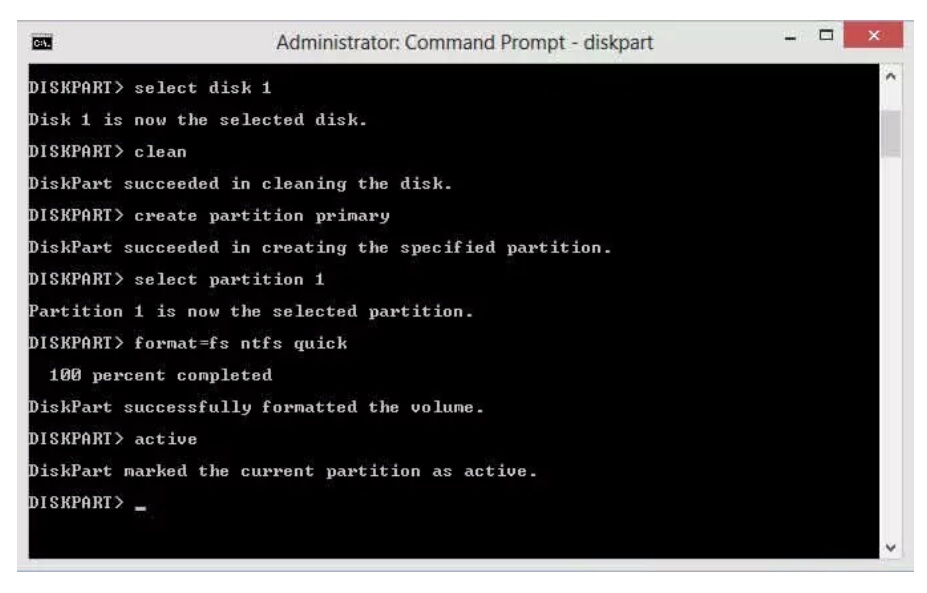
9. . Type ‘active’ and hit Enter. Activating contemporary partition
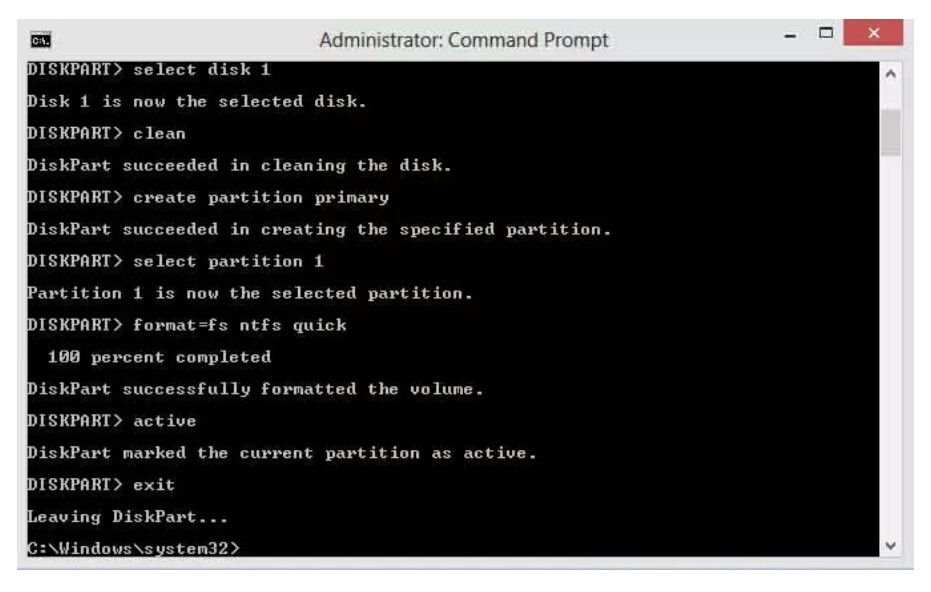
10. Type ‘exit’ and hit Enter. Leaving DISKPART application however do not shut the Command Prompt instead. We would still want it for next process
Step 2: Creating Boot Sector
Let us assume that the flash / USB pressure is the D: force and the DVD installer placed on force F :. The first step, we will navigate Command Prompt to set installation DVD as its active directory.
1.By default, Command Prompt’s active listing for Administrator permission is on C:\Windows\System32>. We will navigate Command Prompt to set on DVD (F:) as its energetic directory. Just type ‘f:’ then hit Enter, and the energetic listing changed to F:.
2. Type ‘cd boot’ and hit Enter. Active listing changed to F:\boot>.
3. Type ‘bootsect /nt60 d:’ and hit Enter. Creating boot sector on D: drive (USB flash drive).
4. Type ‘exit’ and hit Enter to close the Command Prompt. Until this step we have made a bootable USB drive sucessfully, and the flash drive is ready to be used as a boot media
Step 3: Copying Installation Files
To installation Windows from a bootable USB drive, we simply want to replica the total set up files contained on the DVD installer to flash drive. To do this, open the prompt as in previous steps. Once it opens, type ‘xcopy f: \ *. * d: \ / E / H / F’ so press Enter. Wait till all the archives in the DVD installer copied to the flash drive. Now bootable USB pressure is geared up to be used for putting in Windows from flash power and we’re done.